Thursday, September 11, 2014

Banana Walnut Chip Ice Cream

I've always loved making homemade ice cream and remember family reunions when I was a little girl - Great-Grandma Thomas's homemade vanilla ice cream was always being hand-churned by someone. The ice cream never made it to the freezer because everyone ate it as soon as it was thickened. I've always been partial to homemade vanilla ice cream because of that childhood tradition. And I've always had an ice-cream maker for days when I craved Great-Grandma's homemade ice cream, and had that time to make it. Those days didn't come very frequently because of the time it took to freeze it . . . the patience of adding more ice and waiting and waiting until it was ready. That problem is now solved thanks to my generous sister, Lilly. Last spring, I visited her in Texas and she had a modern mini ice cream maker that you kept the bowl in the freezer at all times so that whenever you had an inkling for ice cream, all you had to do is whip it up and it would be frozen in15-20 minutes. While we were there, we made a root beer float ice cream . . . I fell in love with her machine and for my birthday in April she sent me one too. Since then I've strayed from the homemade vanilla a bit and have been trying some delicious frozen yogurts and rich gourmet ice creams. This recipe came with the instruction manual and has become a family favorite this summer so I thought I'd share.

*Don't be intimidated by the multiple steps in this recipe. They are not difficult and once you try this delicious ice cream, you'll be willing to make those steps over and over again.  

Ingredients:

1/2 cup whole milk
2 cups heavy cream
1 whole vanilla bean, halved and seeds scraped
1/2 teaspoon pure vanilla extract
1/4 teaspoon salt
1/3 cup packed brown sugar
1 tablespoon water
2 tablespoons unsalted butter
2 large bananas, cut into 1 inch pieces
1 1/2 tablespoons rum flavoring
1/4 teaspoon fresh lemon juice
1/3 cup Ghiradelli 60% cacao dark chocolate chips
1/2 cup toasted walnuts, roughly chopped

Step 1
In a medium saucepan set over medium-low heat, bring the milk, cream, vanilla bean (including the pod), vanilla extract, and the salt just to a boil. Remove from heat, let mixture steep for 30 minutes.


Step 2
While the milk/cream mixture steeps, heat the sugar with water in a large skillet until it begins to sizzle.
Stir in the butter and heat until melted.
Add the bananas; cook for about 2 minutes, or until fragrant and softened.


Carefully stir in the rum and cook for an additional 2 minutes, or until slightly thickened. Remove from heat.
Using a slotted spoon, strain the bananas/sugar mixture, reserving the syrup and banas in separate bowls.


Step 3
Remove the vanilla pod from the steeped milk/cream mixture; discard pod.

Stir the lemon juice into the bananas and then mix the bananas into the steeped milk/cream. Cover and refrigerate mixture 1 to 2 hours, or overnight.
Step 4
Turn on the Cuisinart ice cream maker; pour the banana mixture into the frozen freezer bowl and let mix until thickened, about 15 to 20 minutes.

Step 5
While the ice cream is churning, melt the chocolate chips in a bowl set over a pot of simmering water; reserve.
Step 6
When the ice cream is almost fully churned, gradually add the sugar syrup; let mix until fully combined.

Once the sugar syrup has been mixed, add the walnuts through the top of the ice cream maker; let mix until combined.
Right before the ice cream is done, drizzle the melted chocolate into the churning ice cream. The ice cream will have a soft, creamy texture.


If a firmer consistency is desired, transfer the ice cream to an airtight container and place in the freezer for about 2 hours.

Serve and enjoy.

Wednesday, August 13, 2014

Quinoa & Veggie Stuffed Zucchini

In mid-July when we were at the height of having house guests and traveling to visit family in Wyoming, my garden started producing zucchini like crazy. I know, this is not a strange phenomenon. I didn't really have time to shred it all and freeze it and granted I could have just left them in the fridge and they would have been just fine for another week, but I had my mind set on trying out this delicious vegetarian recipe so I threw it all in a bag and hauled it to Wyoming with me and decided I could help my mom out and make a simple summer meal for the whole family. The 6 zucchinis that this recipe is for was not enough to feed my whole family so I doubled it and it turned out just perfect. And of course, I got so caught up on meeting my newest nephew that I never took a final product photo, so the process will have to do for now:
Ingredients:
2 T olive oil (or coconut oil if you prefer)
1 medium onion, diced
1 red or yellow pepper, diced
2 Roma tomatoes, finely diced
1 Tbsp thyme or 1-2 sprigs fresh thyme leaves
salt and pepper
6 medium zucchini, halved lengthwise
1 cup spinach leaves, chopped
1 cup cooked quinoa
3-4 large basil leaves
1 T. Parmesan cheese, grated
1/2 c. Mozzarella, grated
Instructions:
Preheat oven to 375. In a skillet, saute onion and pepper in oil over medium high heat. While onions and peppers are sauteing, scoop the inside flesh of the 6 zucchinis out and dice into small pieces. When onions are translucent, add tomatoes and diced zucchini cook until soft. Add thyme and salt and pepper to taste. Saute for a couple of minutes and then add spinach leaves - cook until wilted. Remove from heat and add the cooked quinoa, fresh basil, and mozzarella to sauteed ingredients and mix.


 Distribute filling evenly into halved zucchinis.
 Top with parmesan and give another generous shake of salt and pepper on top and cover with foil. Bake for 30 minutes. Remove foil and bake for 10 more minutes until cheese on top is golden
Remove from oven and serve.

Wednesday, August 6, 2014

Honduran-Style Stewed Tilapia - Tilapia Guisada Estilo Hondureño

When I have time to cook and bake and I'm doing it for pleasure, I usually like to cook alone. However, when I'm cooking for my family's survival (aka: dinnertime), I love to have someone to chat with. This usually means propping the iPad up and skyping or facetiming with my sister, Lilly, or my friend, Lisa, who are usually in the kitchen too. We chop and chat and it makes dinnertime preparation much less painful. I keep telling them that as soon as we can share our dinners via skype, the world will be perfect!  A couple of days ago, I was making this go-to dinner while Lisa was making her famous banana cheesecake. Lisa and I are best friends and taught together and shared leftover lunches together quite often, so she was surprised when I told her about this go-to Tilapia recipe I'd been hiding and promised her I'd post some instructions for her. 

It's hard to believe I've never posted a recipe for this simple, delicious and healthy dish. I can remember ten years ago, standing in the tiny kitchen in our first apartment as Armando showed me this family favorite of his and I took down copious notes in my trusty cookbook. I swear the only reason we were both able to fit in that tiny kitchen was because we were newly weds. It was so narrow that the opposite-facing refrigerator and oven doors couldn't be open at the same time. 

So enough with the reminiscing, here are your ingredients:

3 roma tomatoes
1 small onion
1/2-1 green pepper 
2-3 cloves garlic
1 Tbsp butter
6 Tilapia Filets
water
salt
pepper
cumin
soy sauce
lime

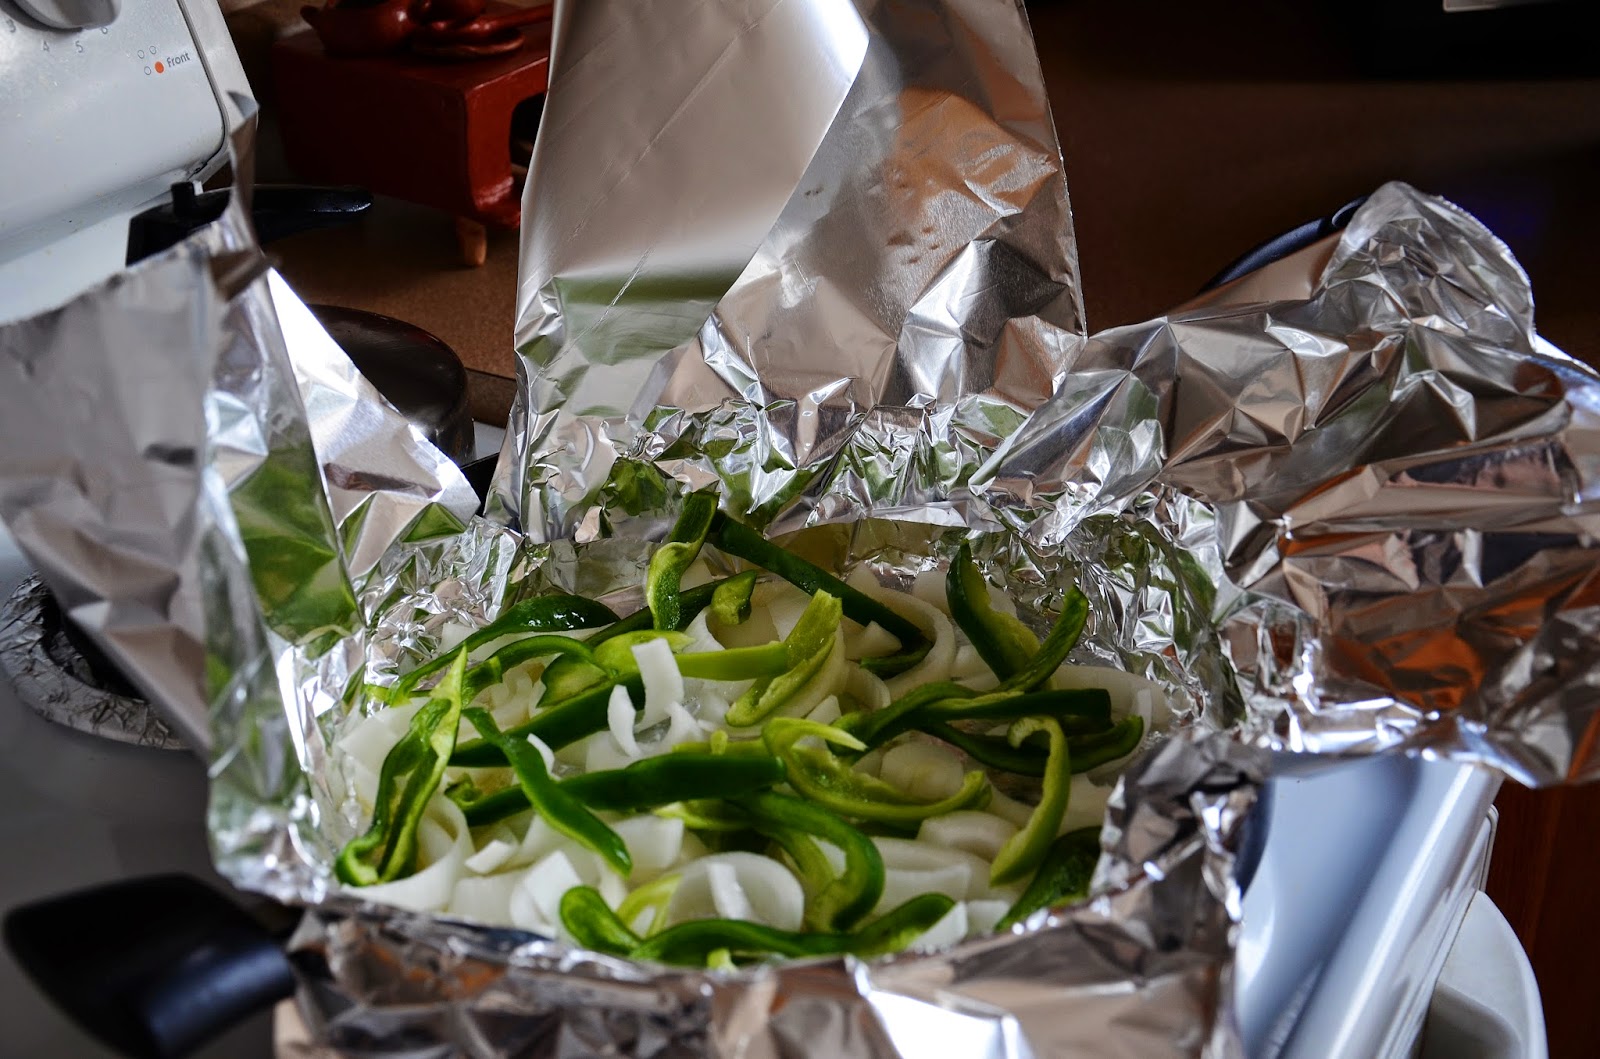
Line a large pan with **aluminum foil (enough to be able to fold and over the dish while cooking). Heat butter in the pan and saute onion and green pepper until translucent. (**In all of the ten years of making this dish, don't ask me why you have to wrap it all in foil. Just trust me that I've tried it without and it's so much better when you use the foil. My theory is that the foil helps keep the moisture in and the juices in this dish are key.

 Add garlic and saute for one minute. Then add tomatoes and saute until they are softened. I like to salt and pepper my sauteed ingredients as I go as well.
 When finished sauteing, keep the heat up and add enough water to cover the bottom of the pan- we're not making soup - we just want there to be enough juice/sauce to cook the fish and have a little juice to poor over each serving. Place thawed tilapia filets on top of sauteed ingredients.
 Salt and pepper them again and sprinkle with cumin powder. Douse each filet with a little soy sauce. As you can see, I haven't perfected my one-handed photography focusing skills. ;) Oh well, you get the idea.
 Squeeze a little lemon juice on each filet as well.
 Bring the liquid to a simmer.
 Now fold the foil over the dish:

Cover your pan with a lid.
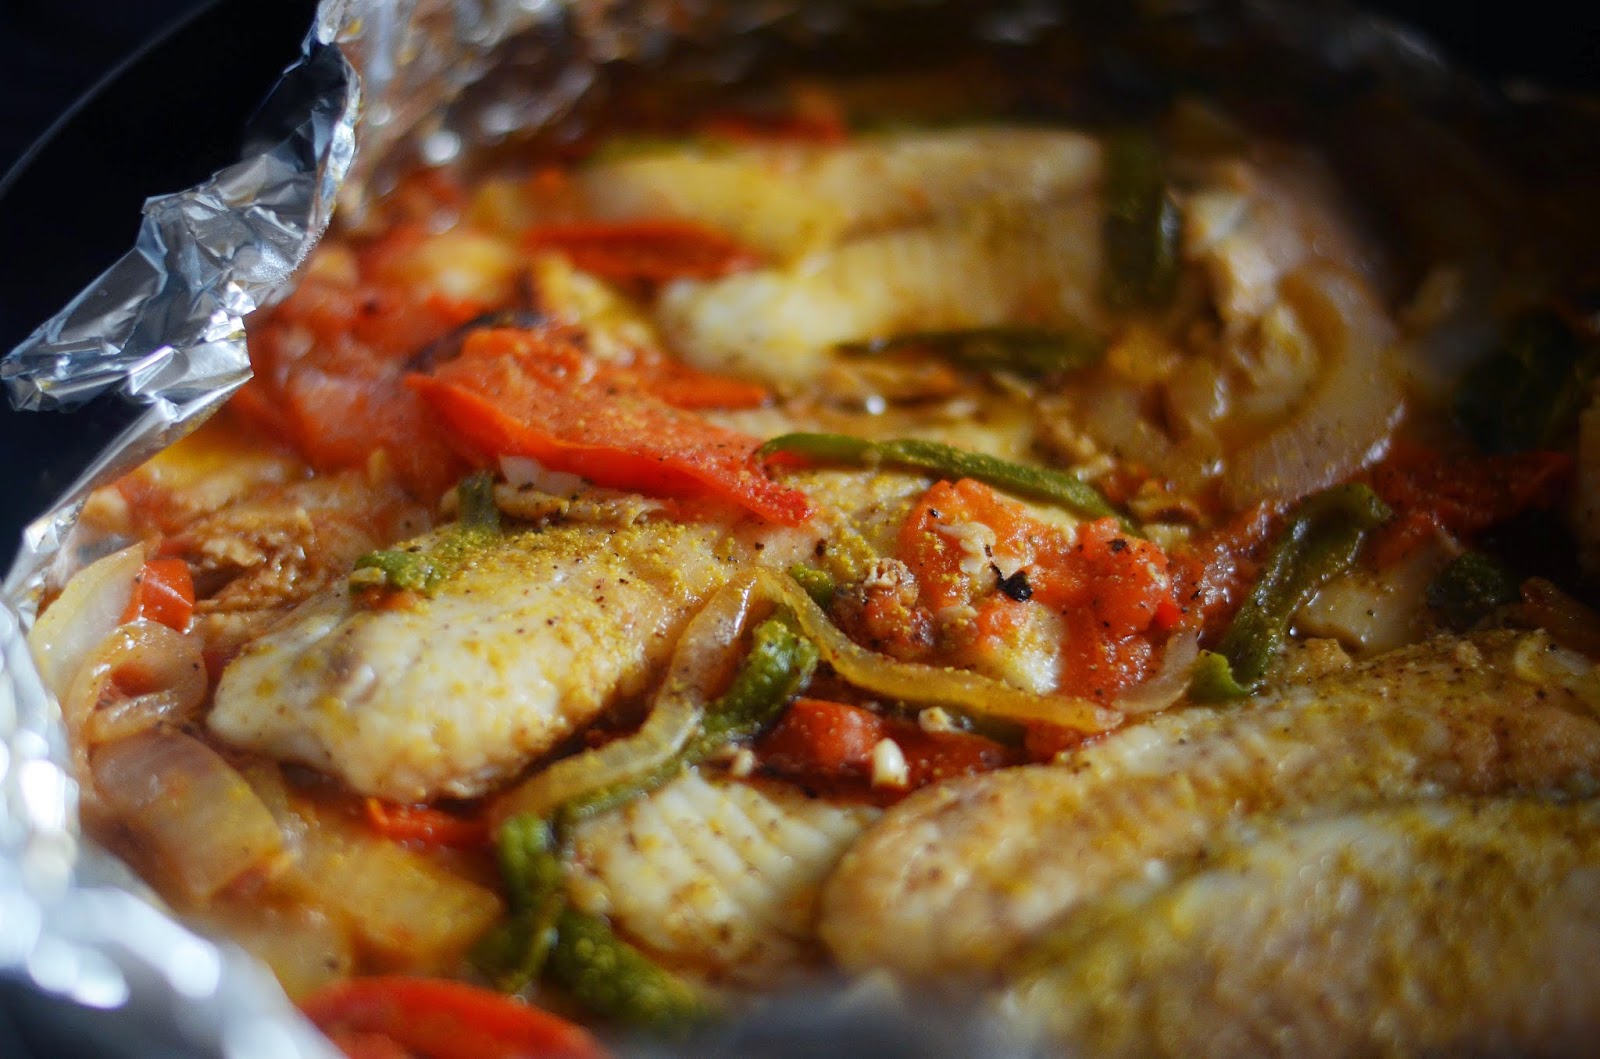
 Turn the heat to medium-low and let simmer for 15 minutes. Sometimes I like to turn the fish over before I cover it with foil - but this can be a tricky process if you're pan is full cause fish breaks easily). If not, you can turn your fish over with all of the veggies coming out on top as you serve it.
My favorite thing to serve with this is brown rice and black beans. I throw the beans in the crock pot in the morning (or over night) and when I get home from work, they're just right. I also leave the rice in the rice cooker and set it to cook so that it's finishing up just as I get home and am making dinner. This meal is the perfect weeknight meal because it cooks so quickly and is simple to put together. And if you're looking for more great recipes, remember my friend, Lisa, that I mentioned earlier in this post? . . . Well she's started her own little blog and is sharing some of her most delicious recipes. I'm sure that banana cheesecake I mentioned will be shared there one day along with many of her amazing dishes, so check out what she has and tell her hello!

Wednesday, July 30, 2014

Corn on the Cob - Mexican Style

My college friend, Christine, introduced me to a lot of delicious Latin-American cuisine that has stuck with me over the years. Among them were pupusas from El Salvador and Mexican-style fruit with chile, lime and salt. She's a spontaneous person, always looking for a little adventure. One night, we decided we'd kidnap our roommates and take them on a camping trip with whatever they had on their person at the time. I'm not sure if my memory serves me correctly, but I'm pretty sure we didn't get enough blankets and all we had for breakfast were some cans of corn . . . and mayo, chile, lime, and salt. I had never been introduced to Mexican-style corn and this was my first experience . . . unheated canned corn (drained) with all of these ingredients dumped on top and eaten straight from the can. Honestly, I don't even think we had any utensils. That was my first experience with this style of corn. Some time later I had a more authentic version of this corn, this time on-the-cob and grilled. (Not that yours wasn't yummy, Christine) but the grilled on-the-cob version was awesome!

Ingredients:

Corn on the cob, grilled or steamed
Mayo (I've also experimented with butter or sour cream and they work great)
Fresh Lime
Chili Powder
Salt

Spread mayo or butter on the hot corn. Sprinkle with salt, chili powder and squeeze lime juice on top. I don't always have queso seco (dry cheese like queso cotija) on hand, but the Mexican-style crumbled and tossed on top adds an extra depth of flavor to this yummy side-dish.

You'll want to have several napkins on hand.

Wednesday, July 23, 2014

Rustic Tomato Tart

I remember when I happened upon this recipe, I was chatting on the phone about food with my hungry, expectant sister and described this recipe to her. She was so excited that she had all of the ingredients on hand as I read it to her. While she made it, I was left salivating and dreaming about this delectable tart. On my next trip to the grocery store, I picked up everything I needed and my friend, Lisa, and I whipped a couple of these up along with my peach basil pizza one evening after a long day at work. Today, my tomato plants in my garden are heavy with tomatoes that I hope will ripen soon and I've been daydreaming about this delicious tart so I can make this again soon. 

Ingredients:
2-3 ripe red and yellow tomatoes cored and cut into slices 1/8 in thick
salt
1 clove garlic, finely chopped
1 Tbsp unsalted butter, melted
8 by 10 inch rectangle of frozen puff pastry, cut in half and thawed (in the fridge)
3/4 cup shredded mozzarella
4 Tbsp grated hard cheese
2 Tbsp chopped fresh basil
Olive oil for drizzling

Position rack in the upper third of the oven and preheat to 400F. Place the tomato slices on paper towels, season with salt, and let drain 30-60 min. Do NOT skip this step, it is vital as you don't want the juices from the tomatoes to make the crust soggy.

In a small bowl, combine the garlic and butter. Place the puff pastry rectangles on a baking sheet lined with parchment paper. Brush with the garlic butter and season with salt, leaving a 1/4 inch border.
Sprinkle crust with mozzarella and 2 Tbsp Parmesan. 
Arrange tomato slices on top. 
Sprinkle remaining Parmesan. 
Bake until golden  25-30 minutes. Sprinkle with basil and drizzle with olive oil. Serve right away.

Thursday, June 19, 2014

Zipzicles - Homemade Ice Pops

Last June was quite a bit warmer than the 46 degree cold fronts we've been experiencing this June and when I saw these Zipzicle bags somewhere on Pinterest, I had to get some and try them out. Ice Pops or Popsicles are the perfect summer treat but they're usually so full of artificial everything that I hate to buy them. These were the perfect opportunity to have the yummy treats, but make sure I knew what was going into them.

 The girls had a great time helping me make them and were so excited to try them out after their hard work. We tried three different flavor combinations: Pinapple; Coconut Key-Lime; and Watermelon. 


Pineapple: 

For the pineapple, I just made my normal pineapple juice blend and poured it into the bag. Since the sweetness of each fruit is different, the sugar amount and water will vary for each recipe. The trick is to start with a little and add a little at a time, until it's just right for your liking. 


 Watermelon:
For the watermelon, I made my fresco de sandía (watermelon juice) and at the end, I just added a few chia seeds for the look of tiny watermelon seeds - chia is a super food that can be added to just about anything and is great for hydration, endurance, digestion, omega 3's, etc. 


Finally, I made a coconut key-lime with banana:

Coconut Key Lime:
1 can coconut milk - refrigerated
1/4 c key lime juice
1 banana
agave nectar or sugar to sweeten


Remember, do not over-fill them - there is a fill line on them. Make sure to stick to it so that when they freeze, they don't burst. 

Check out zipzicles.com for products and other recipe ideas!